

Setting and Adjusting Time and Date
The time needs to be set initially as well as during “Daylight Savings Time” changes. This is done as follows:
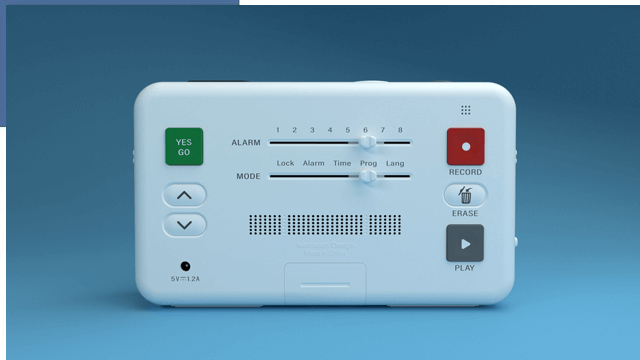
Step 1: Slide “Mode” Selector to “Time”.
Step 2: Press “Yes Go” to enter 12/24 hour, use “up” and “down” to set 12/24 hour.
Note: In both the 12 and 24 hour settings, times will be announced in the 12 hour format. E.g 13:00 will be announced as ‘1 o’clock’.
Step 3: Press “Yes Go” to enter the Date and Time Setting Mode.
Step 4: Use buttons “up” and “down” to select the HOUR.
Step 5: Press “Yes Go” to enter MINUTES, use “up” and “down” to set the minute.
Step 6: Press “Yes Go” to enter MONTH, use “up” and “down” to set the month.
Step 7: Press “Yes Go” to enter DATE, use “up” and “down” to set the date.
Step 8: Press “Yes Go” to enter YEAR, use “up” and “down” to set the year.
Step 9: Press “Yes Go” to confirm.
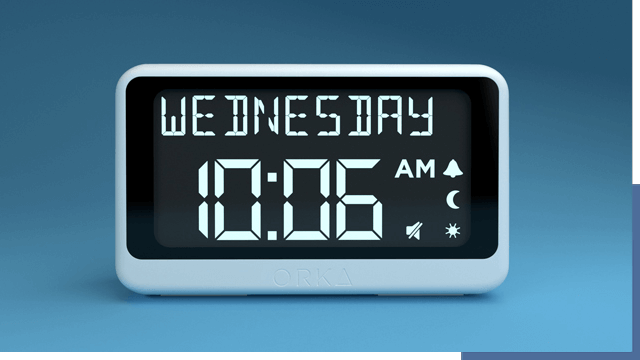
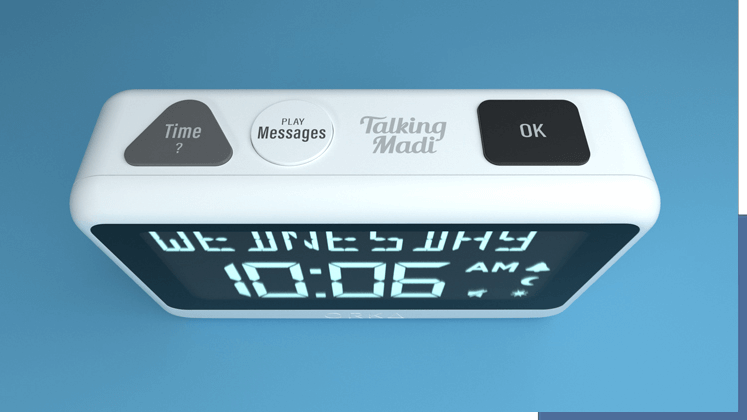
Step 10: Press “Time ?” button on the top of the clock to confirm the date and time.
Step 11: Slide “Mode” Selector to “Lock”.
NOTE: Setting the Voice Alarm Message is a 2 step process. “Setting Alarm Time” and “Recording Your Message” in any order. See the instructions below.
Setting Alarm Time
Note: If no voice messages have been recorded for the selected alarm, the default alarm is Talking Madi’s Tune.
Step 1: Slide “Alarm” Selector to the alarm you wish to set (1-8).
Step 2: Slide “Mode” Selector to “Alarm”.
Step 3: Press “Yes Go” to enter the Alarm Setting Mode.
Step 4: Use buttons “up” and “down” to select the ALARM HOUR for this alarm.
Step 5: Press “Yes Go” to enter the ALARM MINUTE, use “up” and “down” to set the minute for this alarm.
Step 6: Press “Yes Go” to enter the ALARM FREQUENCY, use “up” and “down” to set the frequency of this alarm. You can choose between Daily, Weekend, Weekday, Monday, Tuesday, Wednesday, Thursday, Friday, Saturday, Sunday and Off.
Note: Only one can be selected. “Off” is used when you want to make the alarm inactive but keep the recorded message.
Step 7: Press “Play Messages” button on the top of the clock to confirm the alarm settings.
Note: If no voice messages have been recorded for the selected alarm, the default alarm is the Tune.
Step 8: REPEAT the above steps for each of the 8 alarms you wish to set.
Step 9: Slide “Mode” Selector to “Lock”.
Recording your Messages
Note: Your personalized message is a maximum of 15 seconds per message. When no personal message is recorded for a selected alarm (and a time for that alarm has been set) Talking Madi’s Tune will be used as a default.
Step 1: Slide “Mode” Selector switch to “Prog”.
Step 2: Make sure the “Mute / Tune / Voice” slider switch is on “Voice”.
Step 3: Slide “Alarm” Selector switch to the alarm you wish to set (1-8).
Step 4: Press and hold “Record” button when you are ready to record your message.
Step 5: A “Beep” sound will notify you that the recording has begun.
Step 6: Speak clearly into the microphone. For a clear recording, speak at a distance of 6 inches from the microphone.
Step 7: Release “Record” button once you have finished recording your message. A “Beep” sound will notify you of the end of the recording.
Step 8: Press “Play” button to listen to your message. If you’re not happy with the message, repeat the steps above.
Step 9: Slide “Mode” Selector to “Lock”.
Deleting a Recorded Message
Step 1: Slide “Mode” Selector switch to “Prog”.
Step 2: Make sure the “Mute / Tune / Voice” slider switch is on “Voice”.
Step 3: Slide “Alarm” Selector switch to the alarm you wish to delete (1-8).
Step 4: Press “Play” button to check that this is the message you wish to delete.
Step 5: Press and hold “Erase” button until you hear a “Beep” to confirm the message has been deleted.
Step 6: Slide “Mode” Selector to “Lock”.
Turning off the Alarm Ring
Note: This alarm cancellation button will work regardless of whether “Mute / Tune / Voice” mode on slider switch is selected.
Step 1: Press “OK Message” button on the top of the clock.
Switching Languages (Default is US English)
Language only affects the “Days of the Week” on the display and “Time?” button which will announce the date, day and time in the language selected.
Step 1: Slide “Mode” Selector to “Lang”.
Step 2: Press “Yes Go” to enter the Language Setting Mode.
Step 3: Use buttons “up” and “down” to select between English (USA), English (UK), Spanish, German, French and Italian.
Step 4: Press “Yes Go” to confirm.
Step 5: Slide “Mode” Selector to “Lock”.
Choosing Alarm Modes – Mute, Tune or Voice
The alarms can be set to MUTE and TUNE at any time without losing the voice messages. You can do this by:
Step 1: Slide “Mute / Tune / Voice” slider switch to your choice.
There will be a “beep” sound as you move through each selection.
Note: VOICE must be selected to hear any of the recorded messages.
Adjusting the Volume
The volume is adjusted by the slider switch. There is also an external speaker jack to increase the sound by plugging in an external speaker.
Note: If the speaker jack is being used by an external speaker, the speakers on the clock will not operate.
Adjusting the Brightness of the Display
The brightness can be adjusted at any time by sliding switch back and forth to the optimal point.